Orange France FTTP IPv4 & IPv6
Original Author: Kev Willers
Introduction
This guide is for Orange France FTTP using DHCP to connect (this method currently excludes the users of the PRO package).
The guide deals with just the internet connection. Setting up of TV or Phone is not covered here.
Getting ready to make the connection
Orange requires that the WAN is configured over VLAN 832. So the first step is to set up the VLAN on the intended WAN nic as shown below

and the WAN interface assignment should hence look something like this

Configuring the WAN Interface
In order to establish the IPv4 and IPv6 connection Orange requires that the correct parameters are passed for the DHCP and DHCP6 requests respectively
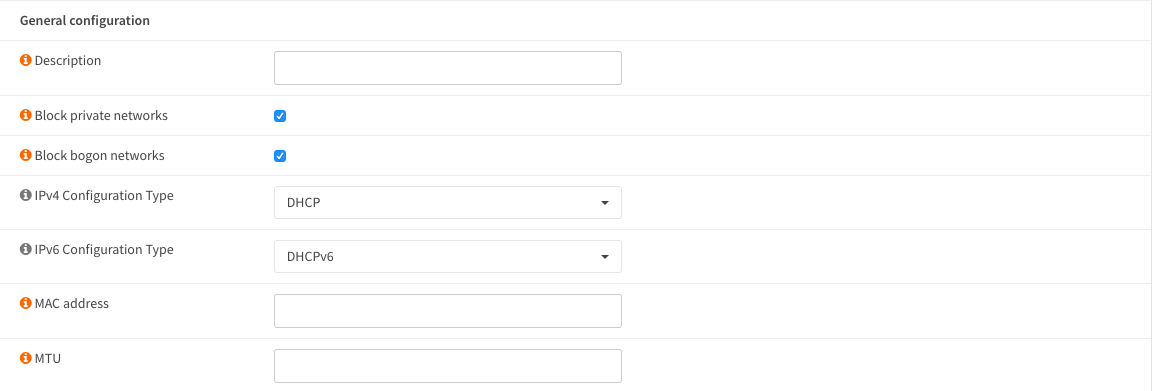
select options DHCP and DHCPv6 in general configuration

On the DHCP request it is a requirement to pass the following:
dhcp-class-identifier “sagem”
user-class “+FSVDSL_livebox.Internet.softathome.Livebox3”
option-90 00:00:00:00:00:00:00:00:00:00:00:66:74:69:2f:65:77:74:FF:AB:XX:XX (hex conversion of the the userid supplied by Orange which looks like fti/xxxxxxx)
Note
The eleven leading hex 00 pairs to be prefixed to the converted userID
These parameters should be passed as comma separated options in the ‘Send Options’ area of their WAN DHCP request

Note
It is necessary to specify the following ‘Request Options’
subnet-mask
broadcast-address
dhcp-lease-time
dhcp-renewal-time
dhcp-rebinding-time
domain-search, routers
domain-name-servers
option-90
These parameters should be passed as comma separated options in the ‘Request Options’ area of their WAN DHCP request
Now for the regional specific part.
Some areas of France require that the DHCP and DHCP6 requests are made with a VLAN-PCP of 6. If you are in one of these regions then this can be done via the ‘Option Modifiers’.
Note
The vlan-parent is the physical WAN interface - igb0, em0 etc.

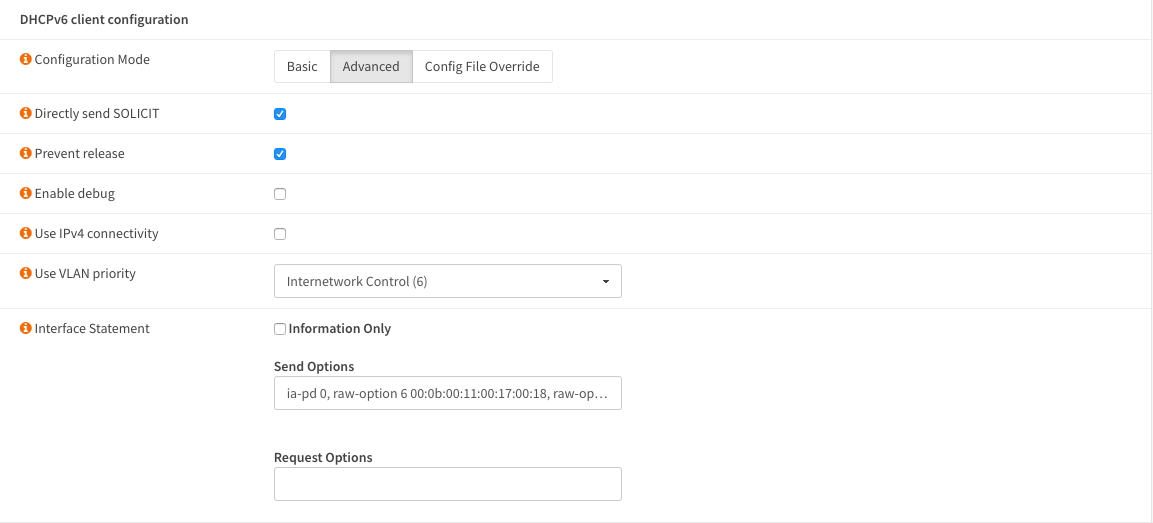
On the DHCP6 request we need to use raw options
Firstly select ‘Advanced’ and your region needs a VLAN-PCP set it via ‘Use VLAN priority’

then add the following options in the ‘Send Options’ field
ia-pd 0
raw-option 6 00:0b:00:11:00:17:00:18
raw-option 15 00:2b:46:53:56:44:53:4c:5f:6c:69:76:65:62:6f:78:2e:49:6e:74:65:72:6e:65:74:2e:73:6f:66:74:61:74:68:6f:6d:65:2e:6c:69:76:65:62:6f:78:33
raw-option 16 00:00:04:0e:00:05:73:61:67:65:6d
raw-option 11 00:00:00:00:00:00:00:00:00:00:00:66:74:69:2f:65:77:74:FF:AB:XX:XX (hex conversion of the the userid supplied by Orange which looks like fti/xxxxxxx)
Note
The eleven leading hex 00 pairs to be prefixed to the converted userID
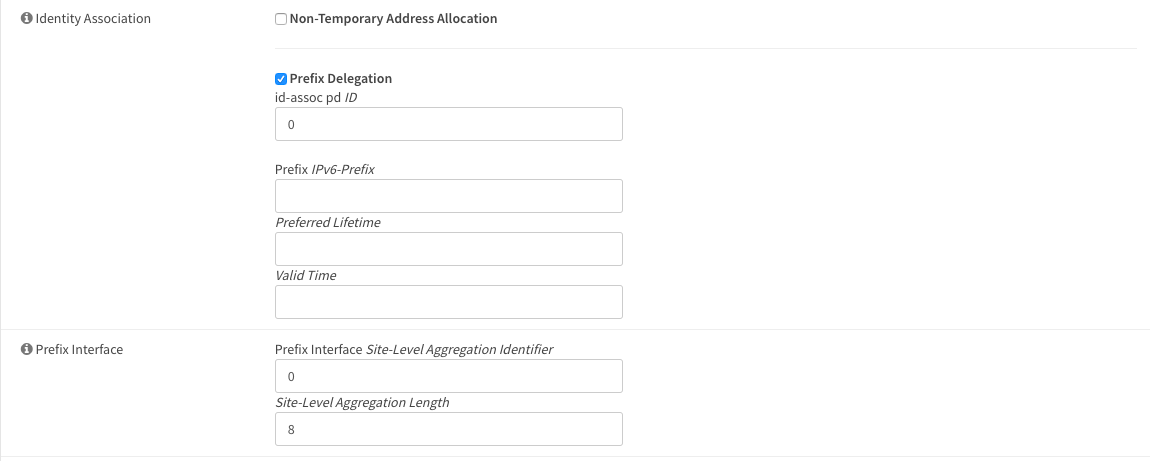
Finally set the Identity Association and Prefix interface as shown

Click ‘Save’ and then ‘Apply’.
LAN Interface
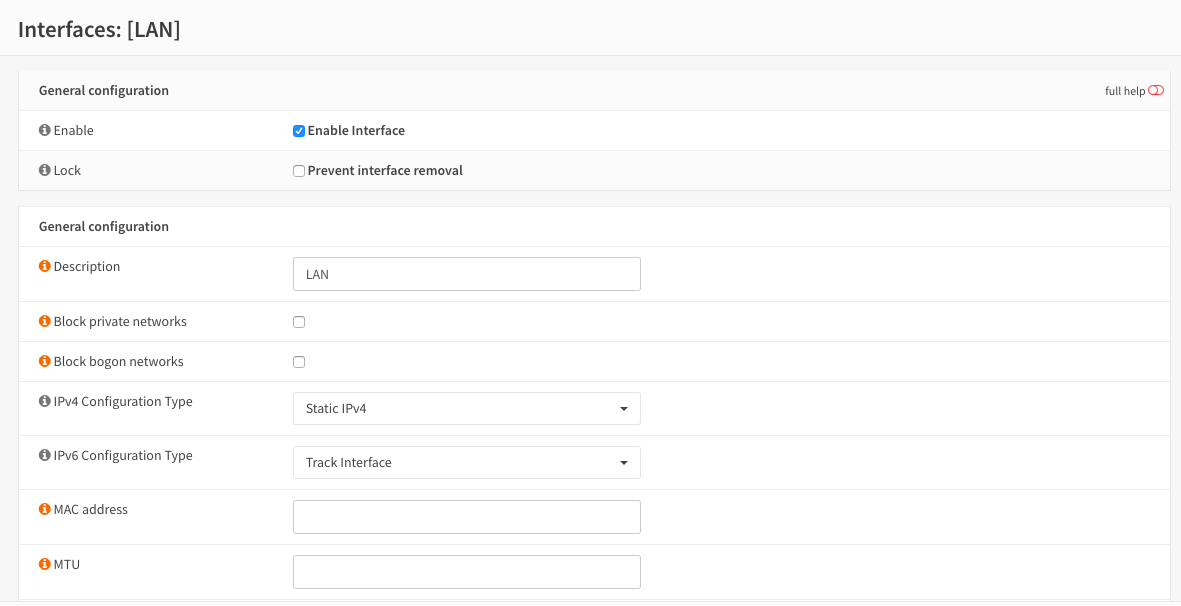
Select and set IPv4 to “Static IPv4” and IPv6 Configuration Type to “Track Interface”.

Finally, set the Track IPv6 Interface to WAN and set the IPv4 address to your chosen address.

Click ‘Save’ and then ‘Apply’.
It is advisable at this point to reboot the system.