Commissioning and migration
This chapter walks through the first commissioning of an AIMdefense, through installing the software on your own hardware, and through migrating from a predecessor system.
These guides started life as printed quick guides. They remain available as PDF downloads at the end of each section, in English and in German.
Note
Where the old guides named a fixed software version, this chapter points to the download index instead. That index always carries the current images, along with checksums and an archive of older releases.
Commissioning the firewall
Cabling
Before you start administering, connect the firewall to the internal and the external network. Have the credentials from your internet provider at hand.
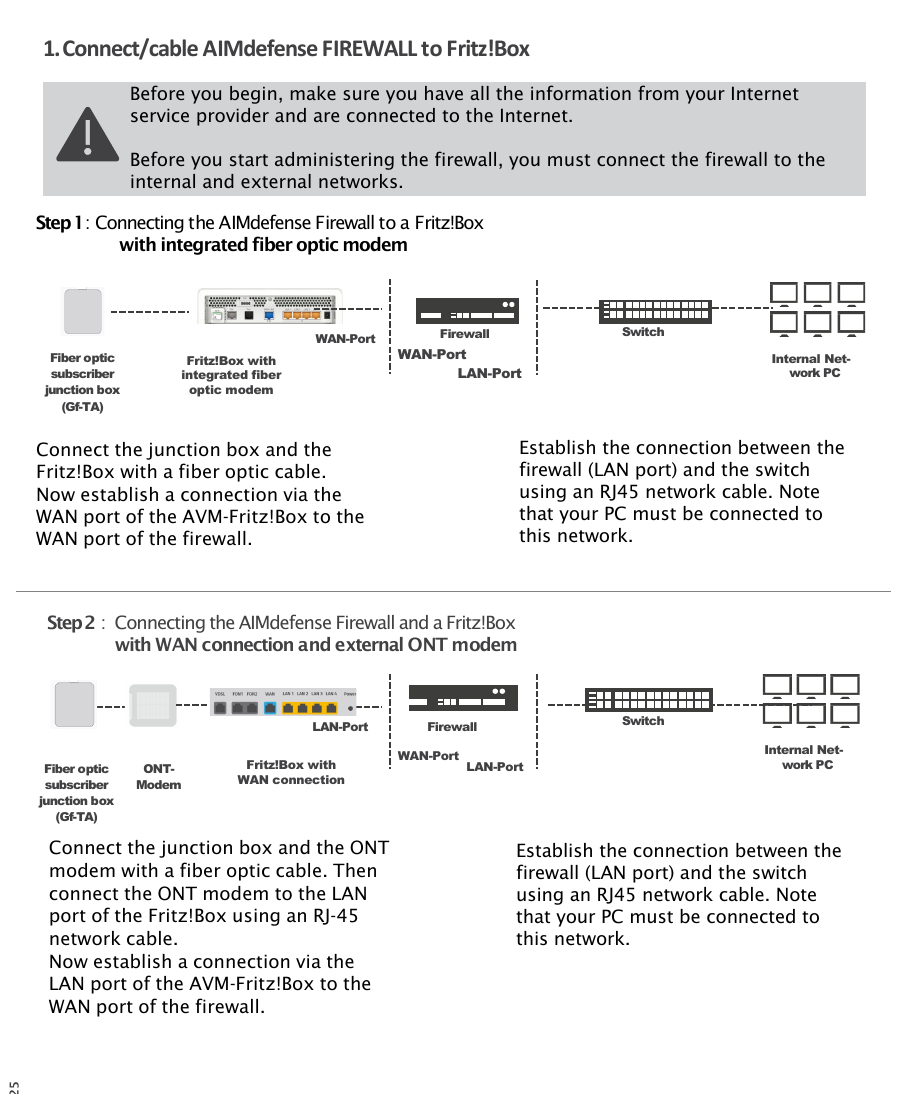
Two cabling scenarios: at the top a Fritz!Box with a built-in fibre modem, at the bottom a Fritz!Box with a WAN connection and a separate ONT modem.
In both cases the rule is the same: the LAN port of the firewall goes to the switch your workstation is connected to. The WAN port of the firewall goes to the Fritz!Box.
First access
Switch the appliance on at the power switch, next to the power connector. Booting takes about two minutes.
Port |
Address |
Purpose |
|---|---|---|
LAN |
|
internal network |
WAN |
DHCP |
external network |
You then reach the web interface at https://10.10.10.10.
User |
|
Password |
|
Warning
Change the password on first sign-in. It is the same on every device.
Your workstation needs an address in the same network, for example
10.10.10.20 with the mask 255.255.255.0.
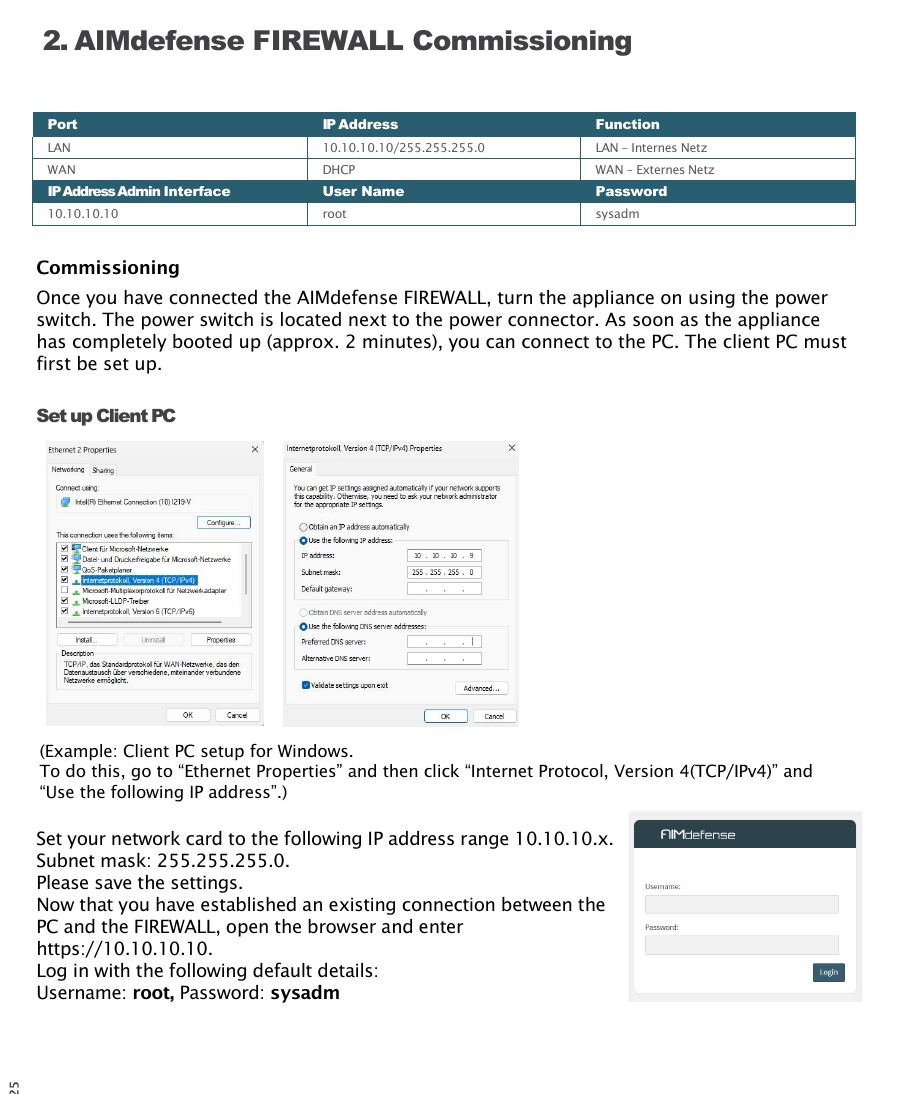
Factory settings and workstation setup.
Setup wizard
After the first sign-in a wizard guides you through the basic settings. Work through it completely before changing anything else.
Checking a PPPoE connection
If no connection is established over PPPoE, look under Interfaces ▸ Point-to-Point ▸ Log File. The reason for the failure is recorded there.
Two causes are common. Some providers require a different MTU or a VLAN tag, which you have to ask them about. And the modem needs current firmware.
Entering the license
Once the firewall is online, enter the license key. You receive it from your partner.
Go to Lobby ▸ AIMdefense License, enter the key and confirm with Register.
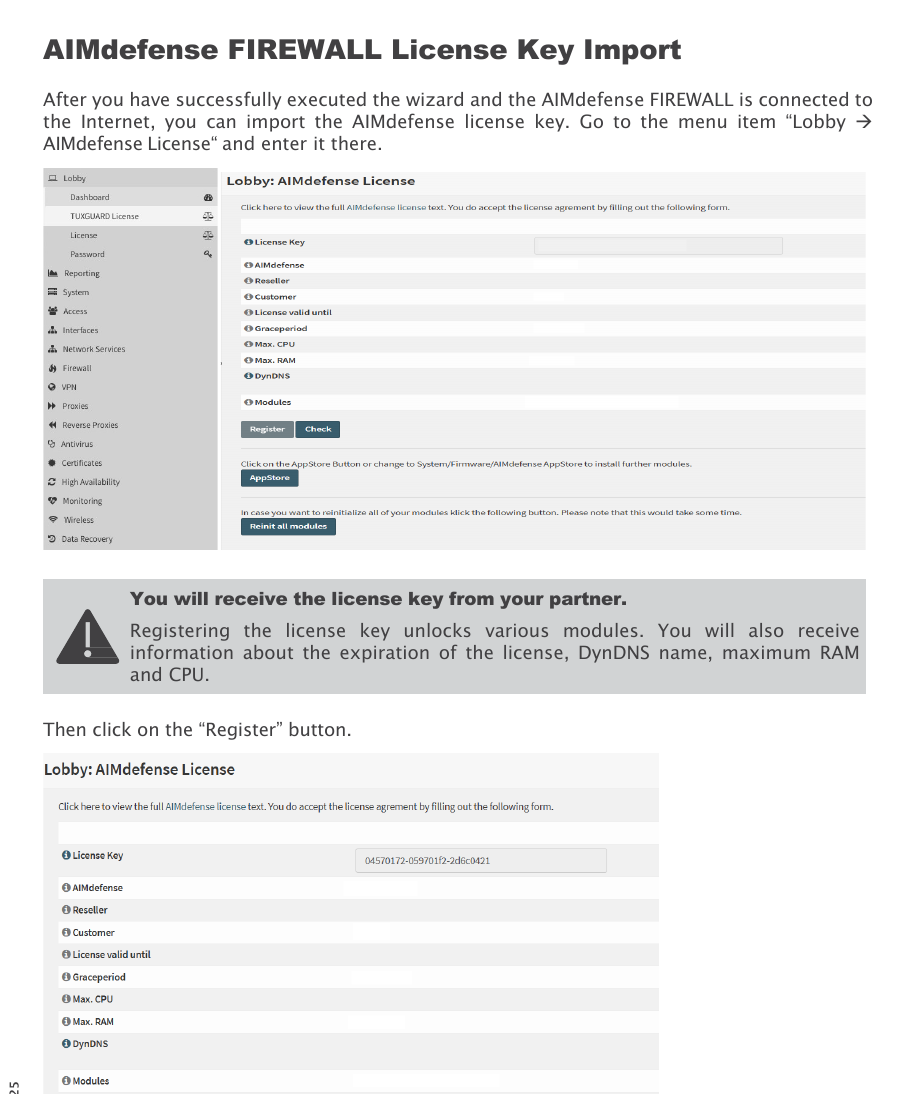
Entering the license key.
Registration unlocks the modules you purchased. Afterwards you also see the expiry date, the DynDNS name and the licensed amount of memory and CPU.
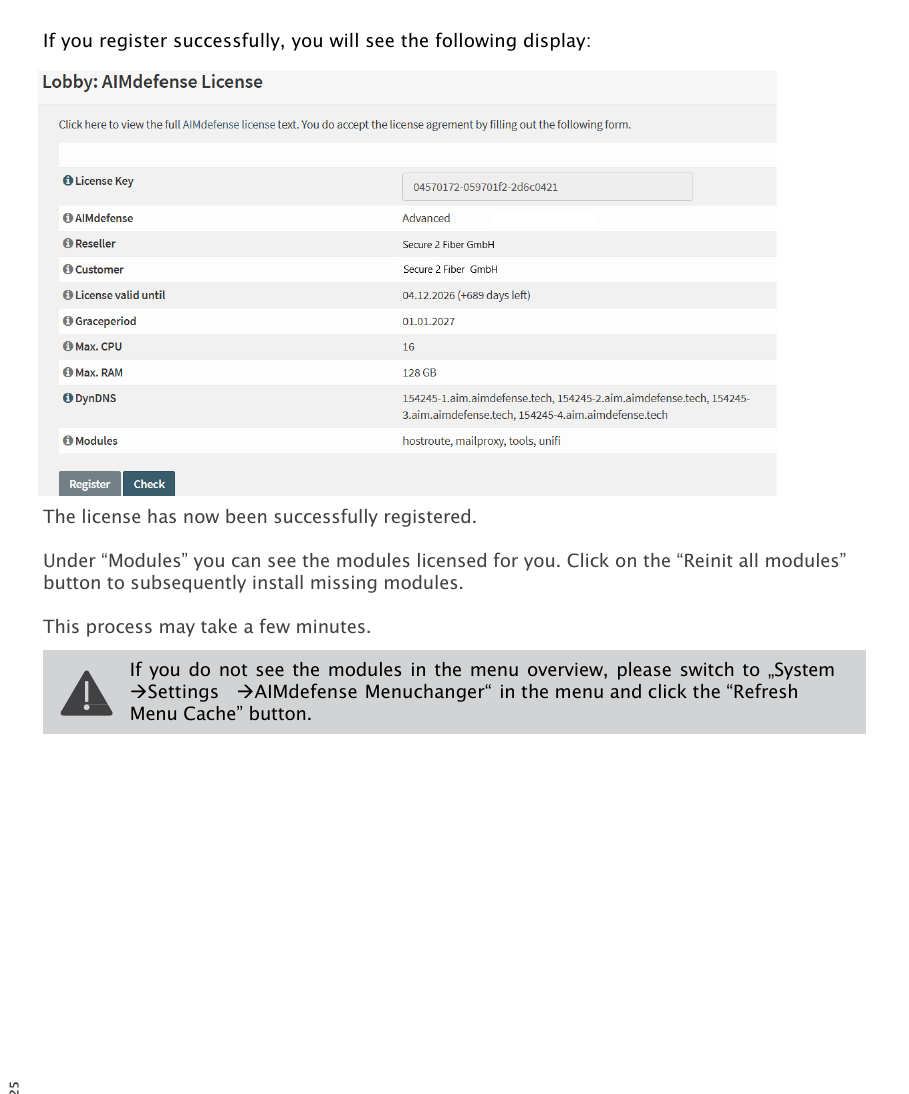
After successful registration: the unlocked modules.
If modules are missing, press Reinit all modules. This can take a few minutes.
Note
If the modules do not appear in the menu afterwards, go to System ▸ Settings ▸ AIMdefense Menuchanger and press Refresh Menu Cache. This is the most common reason for seemingly missing functions. See AIMdefense Plugins for more.
Setting up DynDNS
To reach the firewall under a fixed name, set up DynDNS.
Step 1. Go to Network Services ▸ Dynamic DNS ▸ Settings ▸ General
Settings, set Backend to ddclient and confirm with Apply.
Step 2. Under Settings ▸ Accounts create an account with + and fill it in like this:
Field |
Value |
|---|---|
Enabled |
on |
Service |
|
Protocol |
|
Server |
|
Username / Password |
your credentials |
Wildcard |
off |
Hostname |
your DynDNS name, for example |
Check ip method |
|
Check ip timeout |
|
Force SSL |
on |
Save with Save.
Step 3. Under System ▸ Settings ▸ Administration add the name under Alternate Hostnames as well. Also tick Disable HTTP_REFERER enforcement check there and save.
Note
The DynDNS name belongs to your license. You find it after registration under Lobby ▸ AIMdefense License.
Final settings
So that all aliases can be used, raise Firewall Maximum Table Entries
under Firewall ▸ Settings ▸ Advanced to 2000000.
Important
The default value 1000000 is too small for this. Without this
change not all aliases can be activated.
Then enable the aliases you want under Firewall ▸ AIMdefense ▸ Settings and confirm with Apply.
Downloads
Installing on your own hardware
You can also install AIMdefense on your own hardware. To do so you create a bootable USB stick.
Downloading an image
The images live in the download index at
pkg.aimdefense.tech/ISO/. For every
release you find checksums there, and under old/ an archive of earlier
versions.
The file name is built as
AIMdefense-<version>-<output>-<optional>-<architecture>.iso or
.img.bz2:
version |
the version number, for example |
output |
|
optional |
for hardware-specific images the device type, for example |
architecture |
the machine architecture, for example |
Important
For the AIMdefense FW 600 use only the image with FW-600 in the
name. The general release does not fit that device.
For installation over the serial console take the serial release, for
installation with monitor and keyboard the dvd release. The links with
latest in the name always point to the newest version.
Creating the USB stick
Rufus is suitable for writing the image.
Insert an empty stick and start the program. Select the AIMdefense image under Boot selection and press START. Confirm the warning about overwriting the stick with OK.
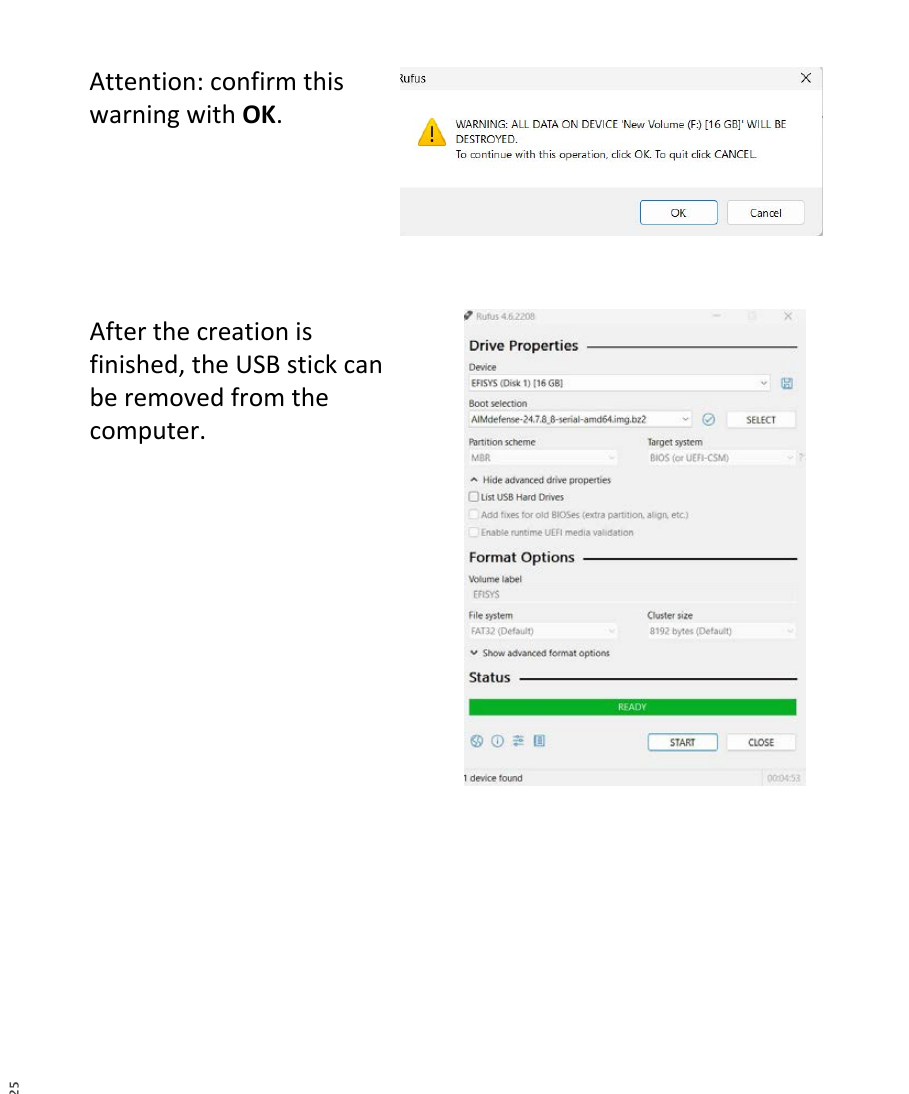
Creating the bootable stick.
Booting from the stick
Press the Del key repeatedly while switching on to enter the BIOS. Under Boot set the USB stick as the first boot device and save with Save Changes and Reset.
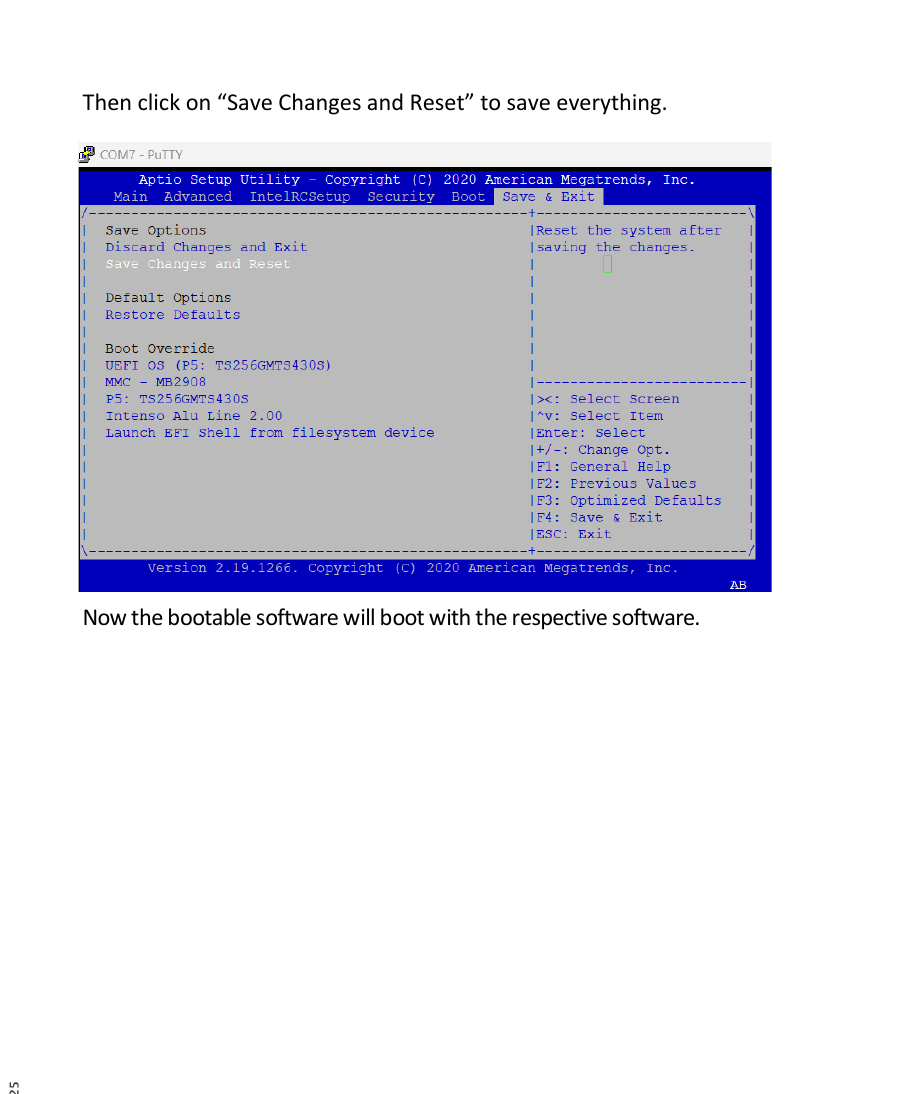
Boot order in the BIOS.
Installing
For the serial release, connect the device to a computer using the
console cable. Insert the stick and switch the device on. It then boots from
the stick and guides you through the installation.
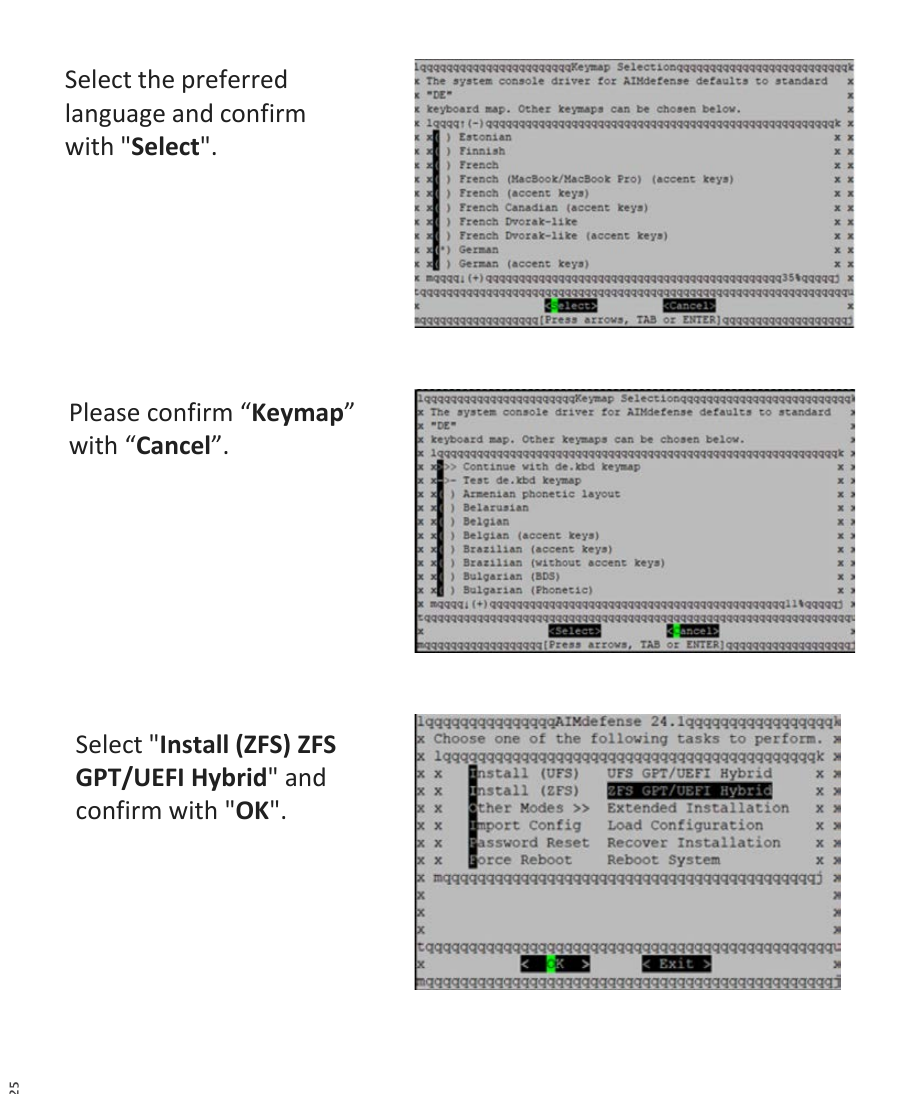
The installation process.
Downloads
Migrating from an ICM Firewall
Existing devices can be converted to AIMdefense without reinstalling.
Important
Migration is only possible from ICM Firewall 22.7 onwards. On an older release, update to 22.7 first. Otherwise only a fresh installation from an image remains.
Warning
If you use the Unifi module, read the next section first. Migration removes the old Unifi package, and without a prior backup the controller data is lost.
Preparing
Take a backup of the configuration. Also note down what you will have to set up again after migration, DynDNS in particular.
Running the migration
Sign in over SSH as user root. Choose option 8 in the menu for a
shell and fetch the migration script:
curl -sko migrate.sh https://pkg.aimdefense.tech/migrate.sh
Important
Download the script and run it separately. Do not pipe it directly into a shell.
The script asks two questions, both of which you confirm with Y.
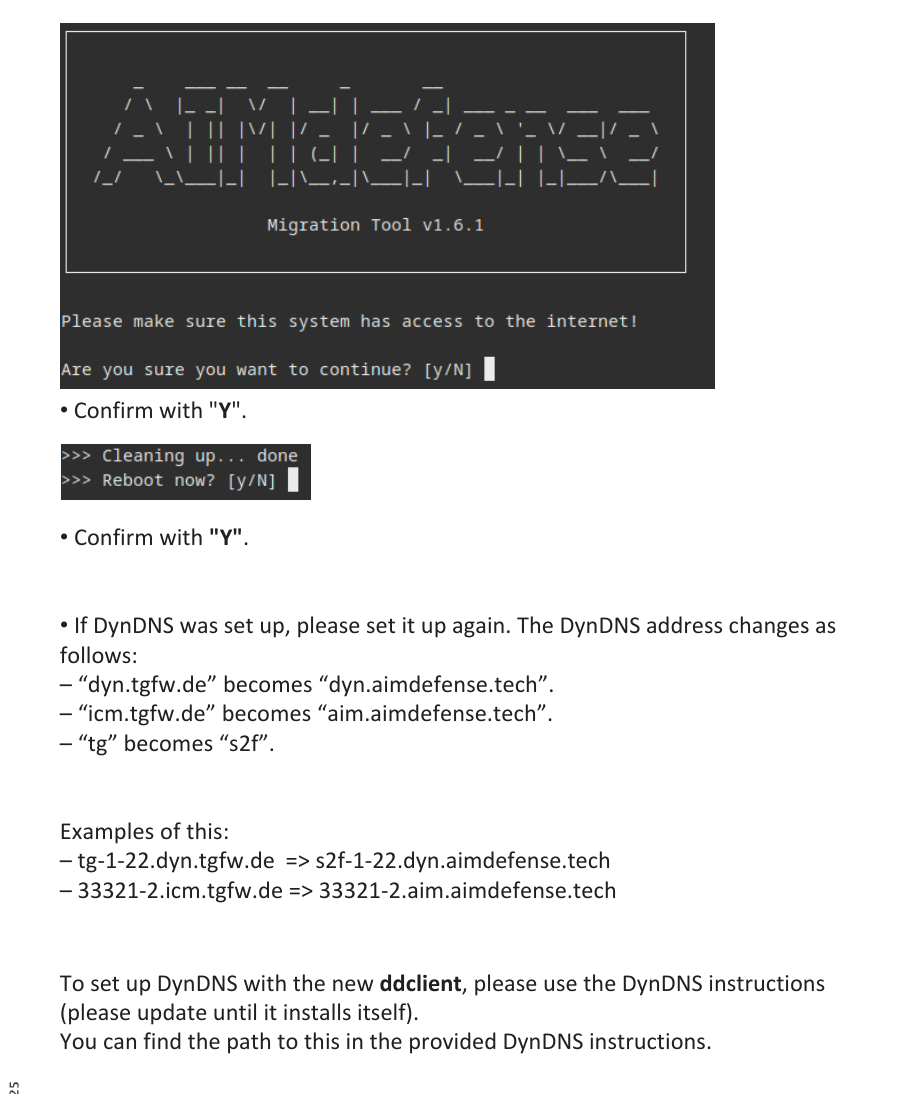
The migration process.
Afterwards you find the log at /root/migration_<timestamp>.log.
Setting up DynDNS again
The DynDNS names change with the migration:
before |
after |
|---|---|
|
|
|
|
prefix |
prefix |
Two examples:
tg-1-22.dyn.tgfw.debecomess2f-1-22.dyn.aimdefense.tech33321-2.icm.tgfw.debecomes33321-2.aim.aimdefense.tech
Then set up DynDNS again as described under Setting up DynDNS above.
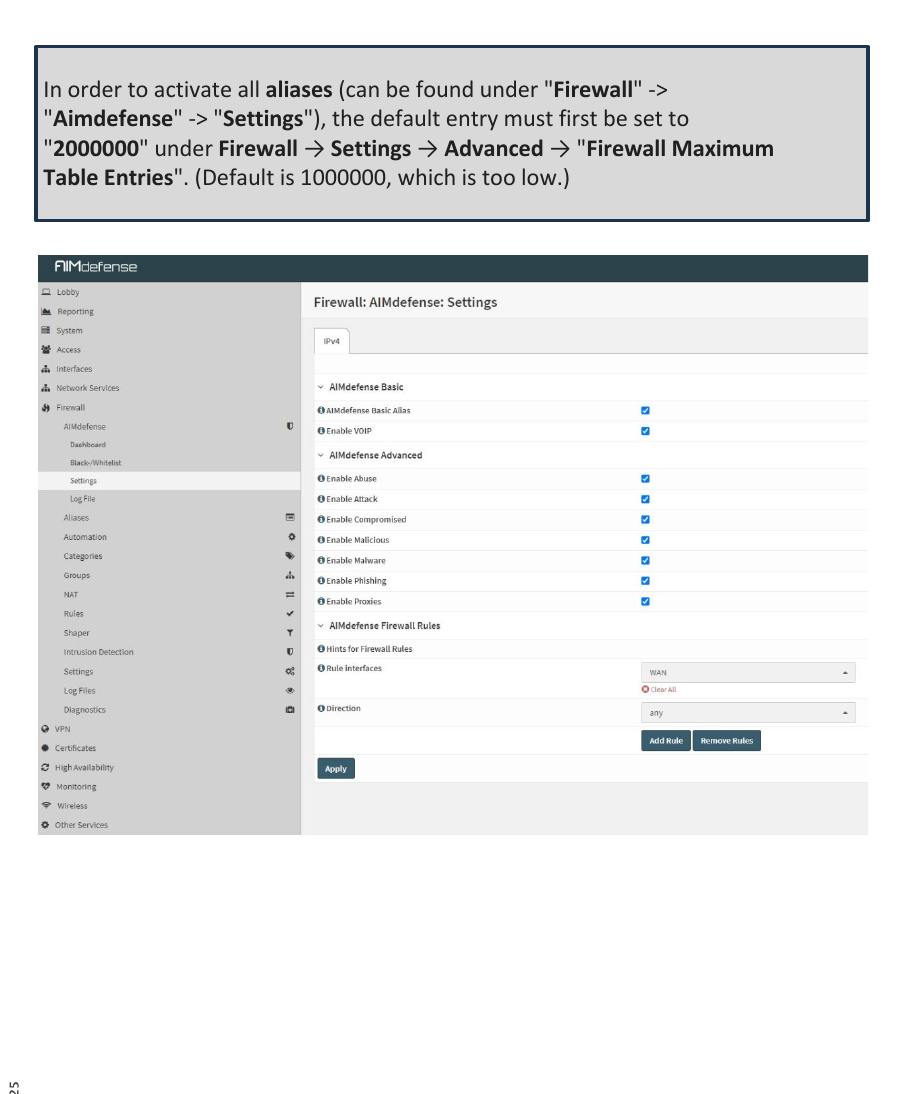
Follow-up work after the migration.
Follow-up work
Raise Firewall Maximum Table Entries under Firewall ▸ Settings ▸
Advanced to 2000000. The default value 1000000 is too small to
activate all aliases. You then enable the aliases themselves under
Firewall ▸ AIMdefense ▸ Settings.
Note
In rare cases the login shell of existing users is set to nologin
during migration. Those users can no longer sign in afterwards. Reset the
shell manually if this happens.
Downloads
Taking the Unifi module along
If you run the Unifi controller on the firewall, carry out these steps before the migration.
Backing up and removing
Create a backup in the Unifi interface and store it outside the firewall.
Sign in as root and stop the service:
service unifi stop
Back up the data directory:
/usr/local/share/java/unifi/data
Remove the old package:
pkg delete -y os-tgunifi
pkg delete -y unifi7
pkg autoremove
You can then start the migration.
Setting it up again
Once AIMdefense 24.1.8 is reached, install the new module:
pkg install os-s2funifi
Restore the data directory you backed up.
Important
Two values have to be correct afterwards, otherwise the controller does not start properly:
In
/conf/config.xmlthe valueis_defaultin theunifisection must be0.In the restored
system.propertiesthe valueis_defaultmust befalse.
Start the service:
service unifi start
Open the controller and import the backup if needed.
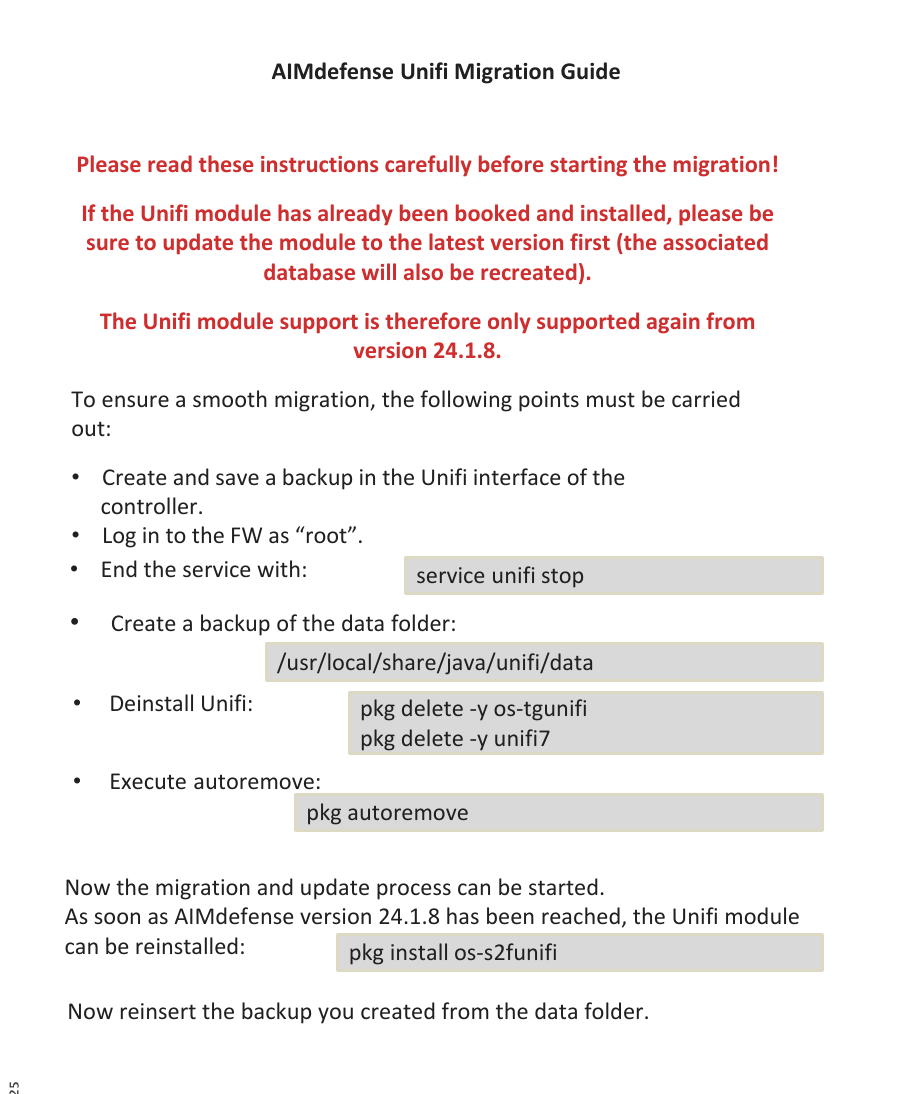
The Unifi migration process.
Note
Do not close the AIMdefense interface during the process. If the Unifi service stops, simply restart it. After importing the backup, wait until the usual sign-in page appears.